Social Media and Integrations
From this section you can manage the settings you will use to increase your e-commerce site's interaction with visitors, measure store performance, and enable translation features.
Social Media Accounts
You can define the official account links of your store on social networks (Facebook, Instagram, X/Twitter, YouTube, etc.) in this area. Depending on your theme's structure, the links you add are usually displayed automatically as icons in the footer or header of your site.
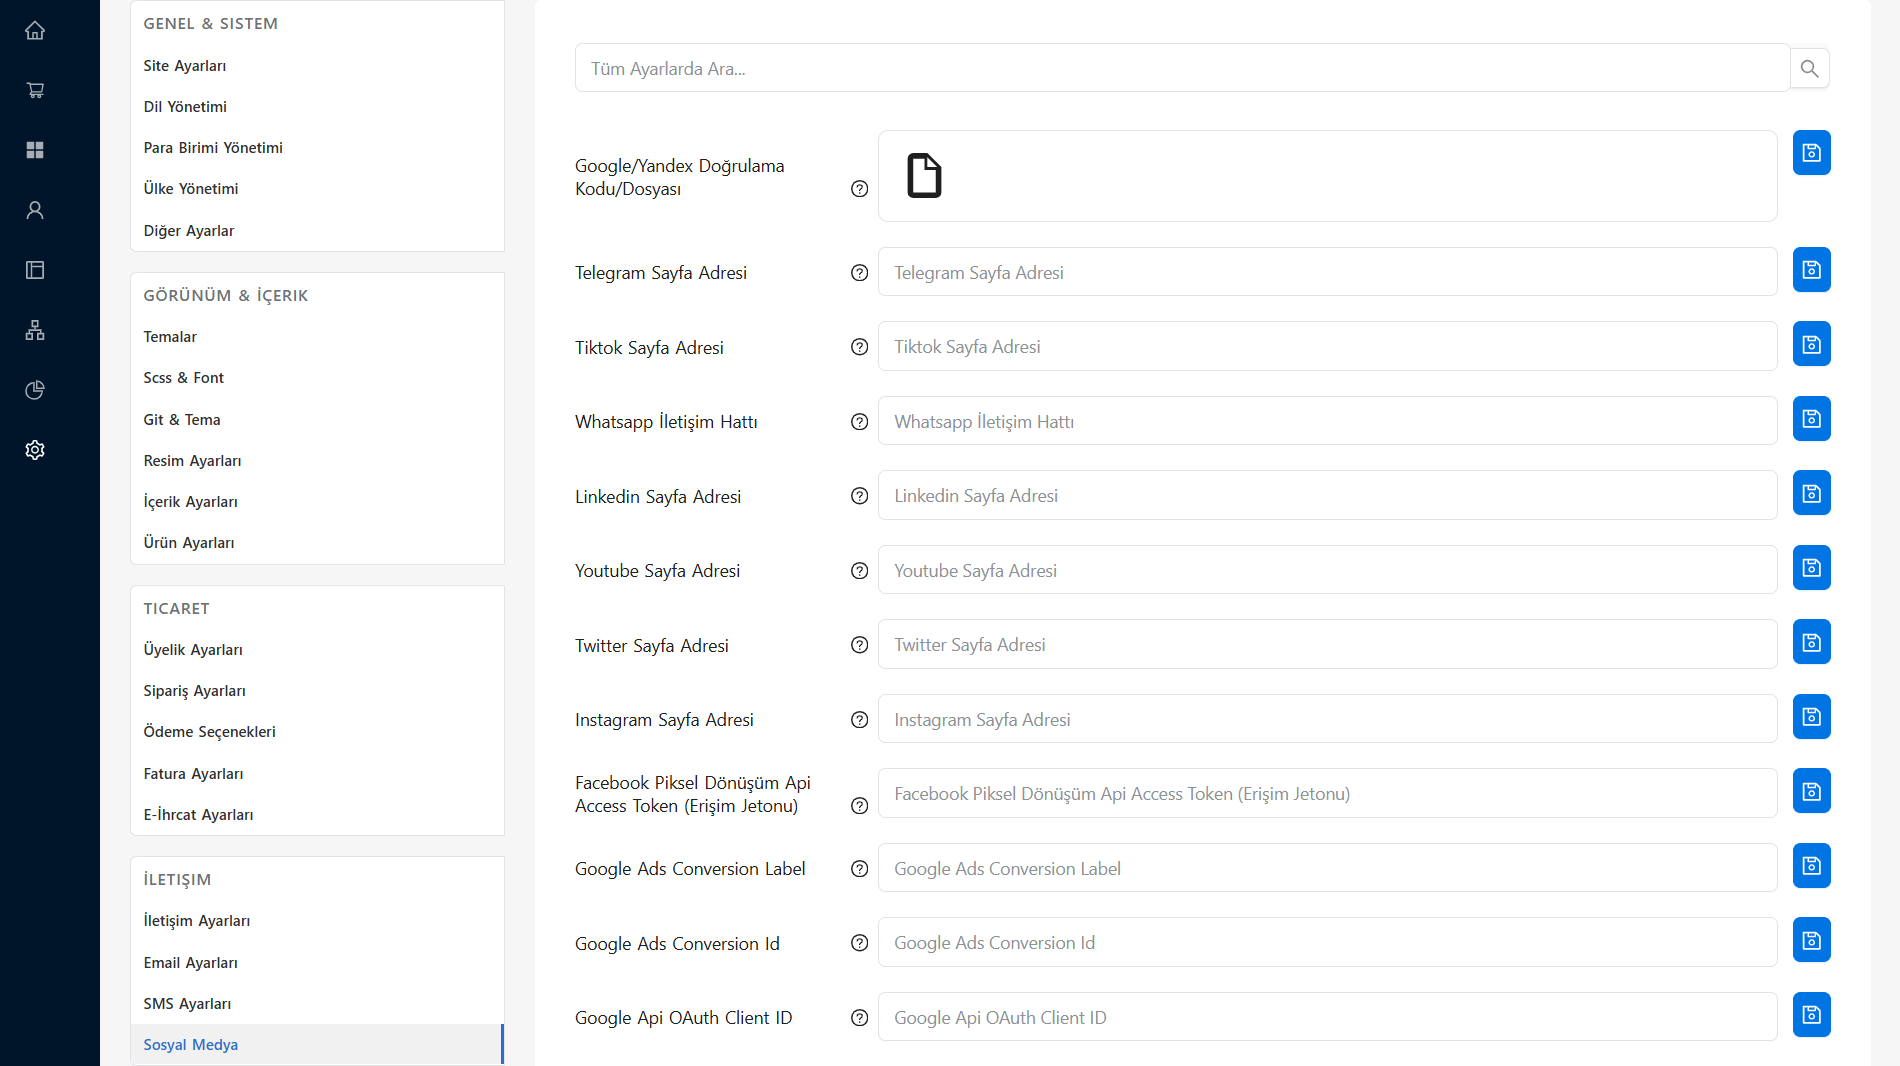
In the social media area you can also configure your WhatsApp, Telegram, or similar direct contact links so your customers can reach you with a single click.
Google Analytics Integration
Google Analytics integration is the most effective way to monitor your website's visitor traffic and analyze user behavior.
Step 1: Get the Measurement ID
- Sign in to your Google Analytics account.
- Go to the Admin section (the gear icon in the bottom left corner).
- Click the Data Streams menu and select your website.
- In the window that opens, copy the code in
G-XXXXXXXXXXformat under the Measurement ID heading.
Step 2: Save It to the Panel
You only need to paste this code into the relevant field in your admin panel:
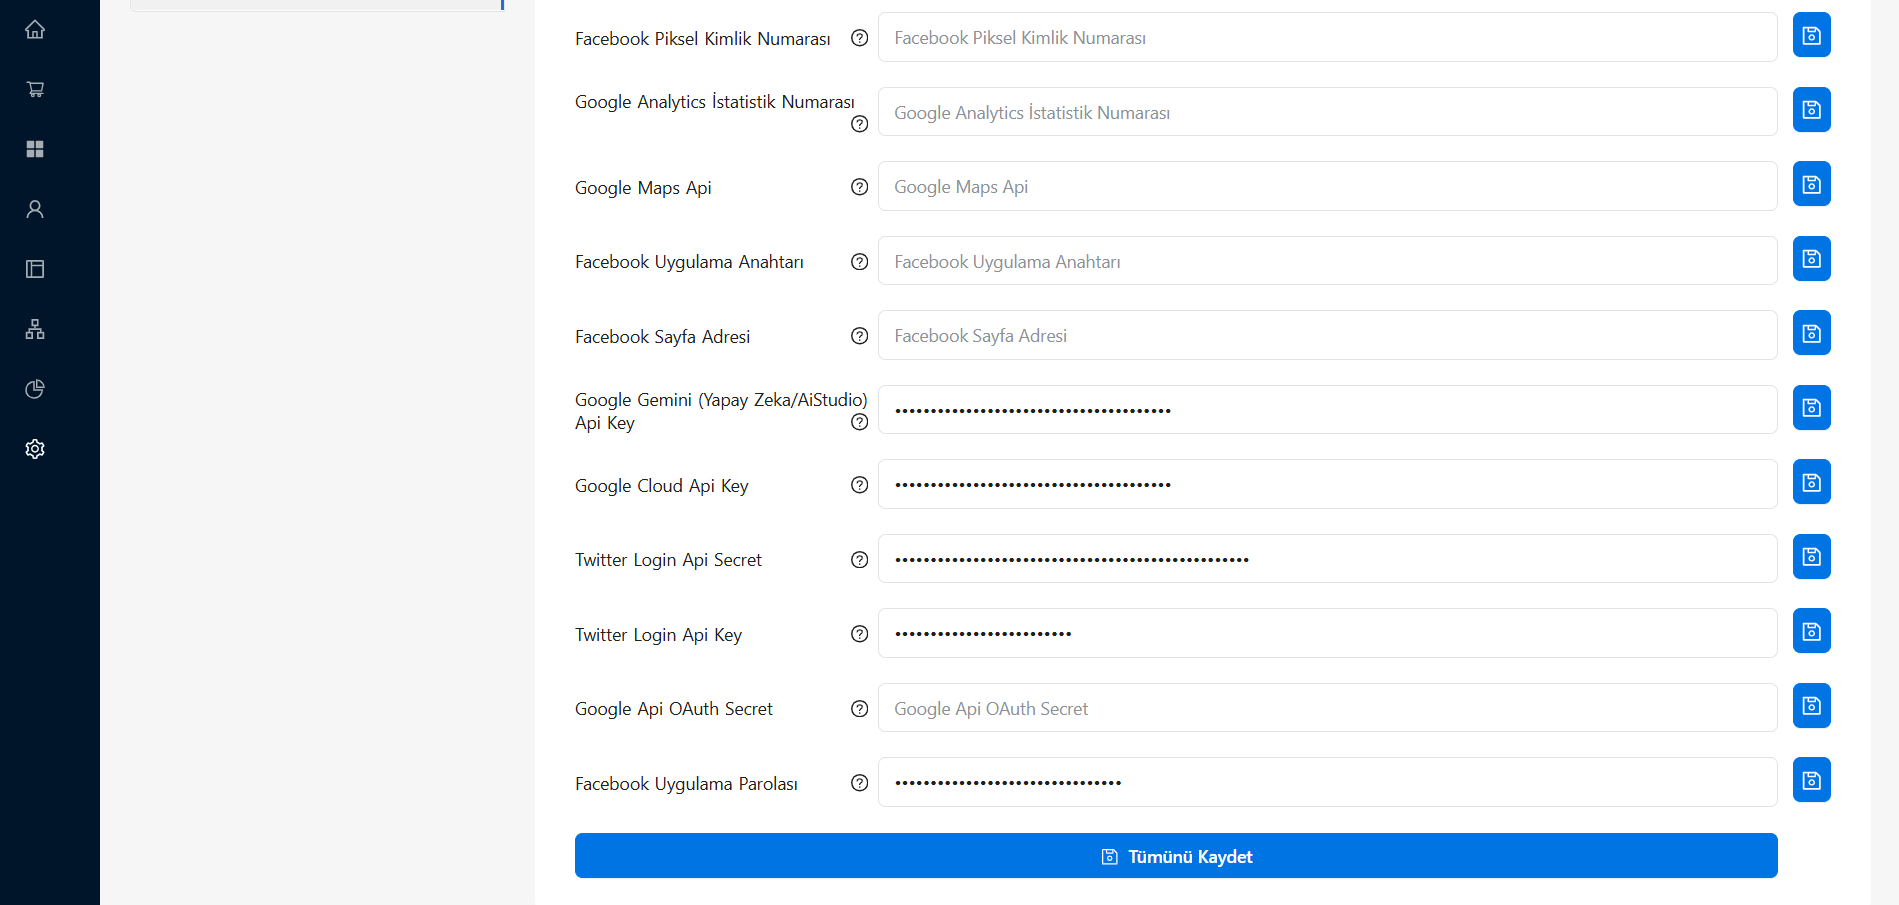
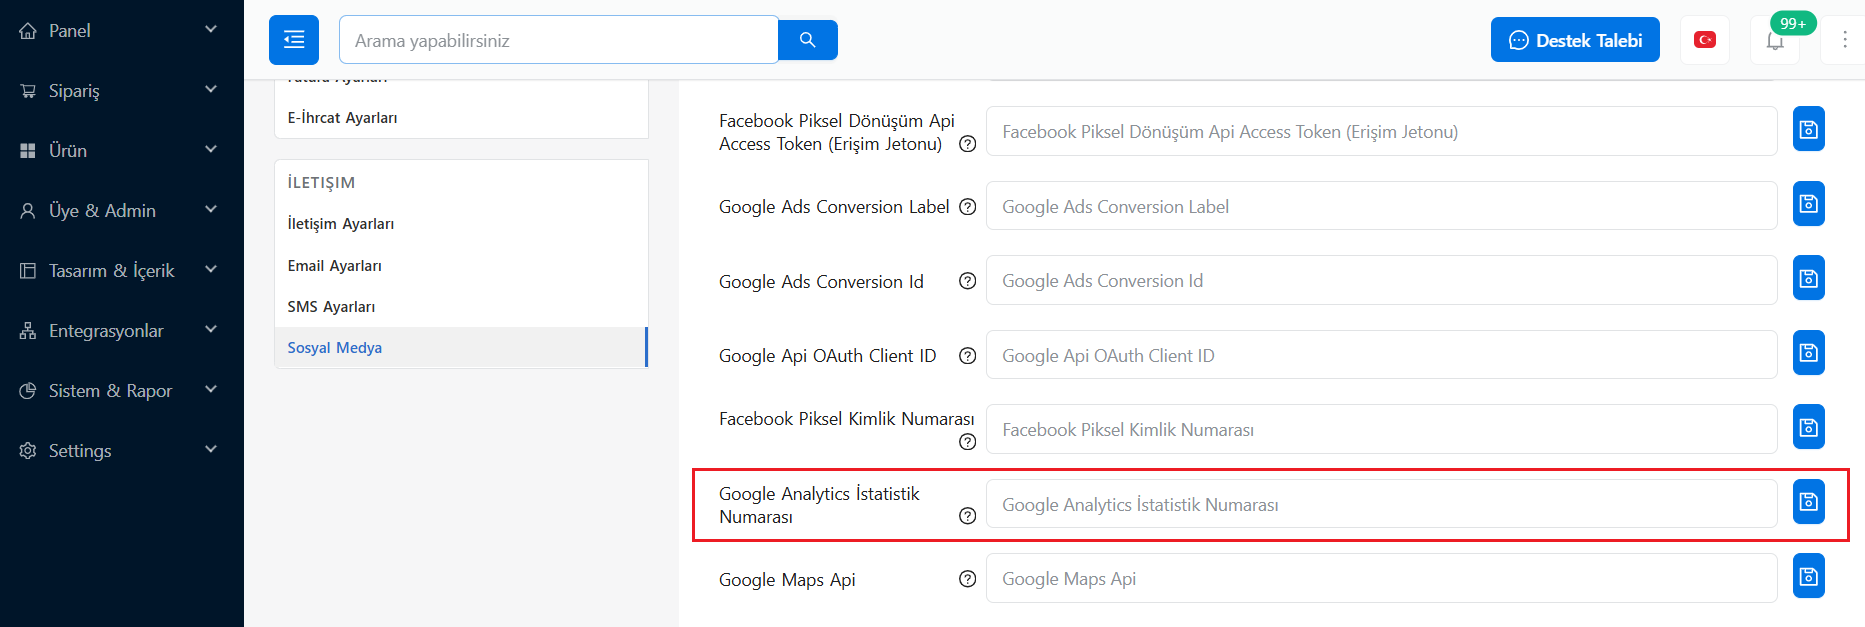
- Go to the Integrations > Social Media tab in your panel.
- Paste the ID you copied into the Google Analytics Statistics Number field.
- Complete the process by clicking the Save icon on the right.
🕒 Data Reflection
It usually takes 24-48 hours after the initial setup for Google Analytics data to start appearing in your panel and reports. Do not worry if you do not see the data immediately; this is normal. You can test whether the setup is correct from the "Realtime" reports in the Google Analytics panel.
Google Cloud Api Key Setting
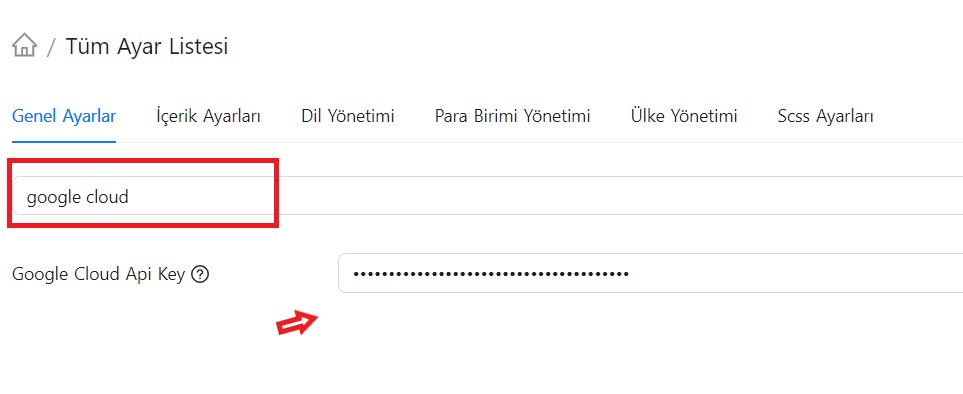
The Google Cloud Api Key under Other Settings is used for the Google Translate translation service. Once you fill in this setting, you can use the service in blocks, menus, categories, product names, and everywhere else that requires language translation, and quickly translate your site into any language you want.
ℹ️ More Information
You can find official details about the translation API in the Google Cloud Translate documentation. For detailed pricing information, go to the pricing page and review the Cloud Translation - Basic heading.
To create the key you need to enter into the Google Cloud Api Key setting, you must sign in to the Google Cloud Console with your Google account. During registration Google will ask for your credit card details for verification purposes. As long as you do not exceed the defined quota (500,000 translated characters per month), you can use the translation service completely free of charge and no payment is taken from your card.
Follow the steps below in order to create an API Key:
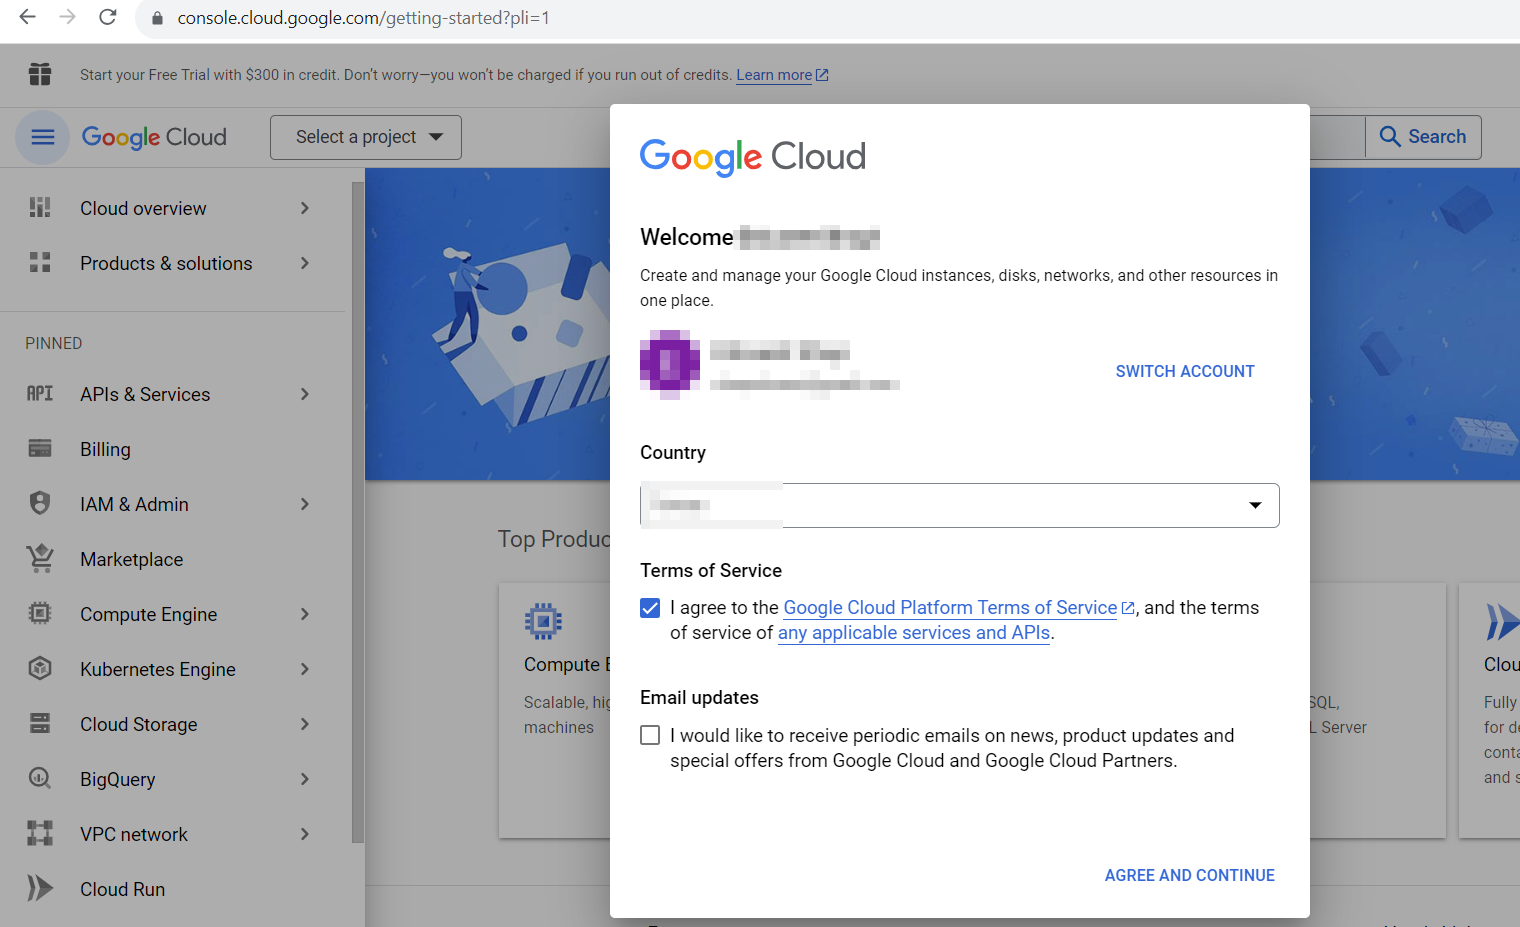
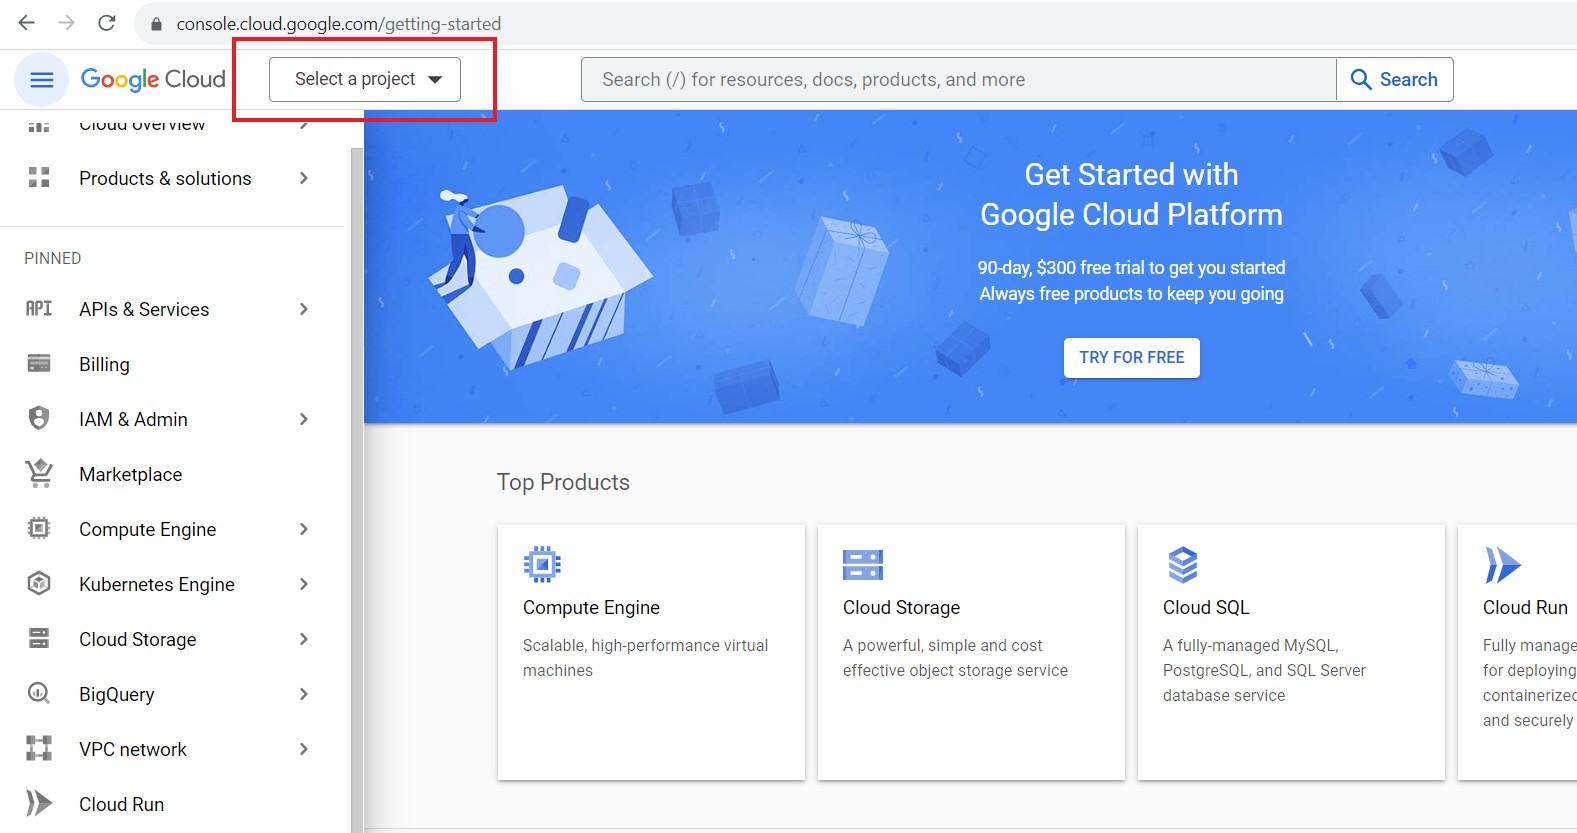
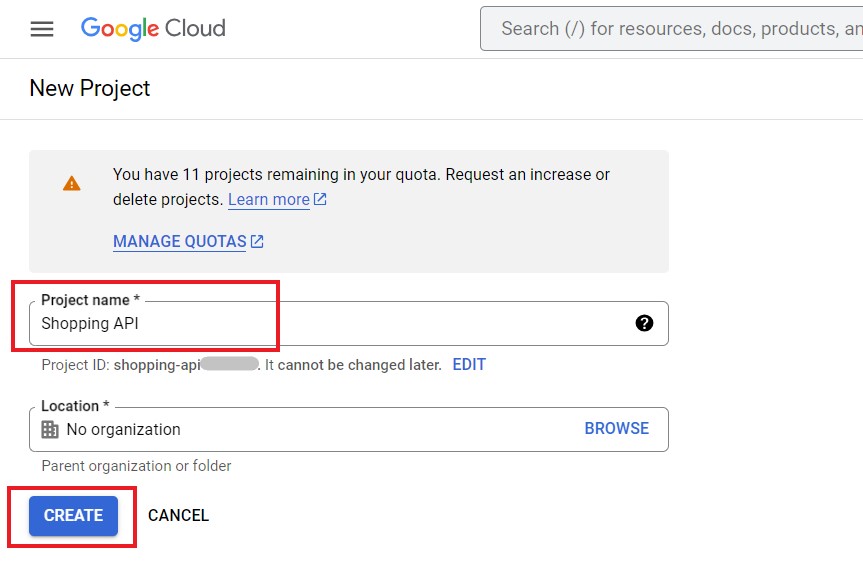
Step 1: Create a New Project
After signing in to the Google Cloud Console, create a New Project.
Step 2: Enable the Cloud Translation API
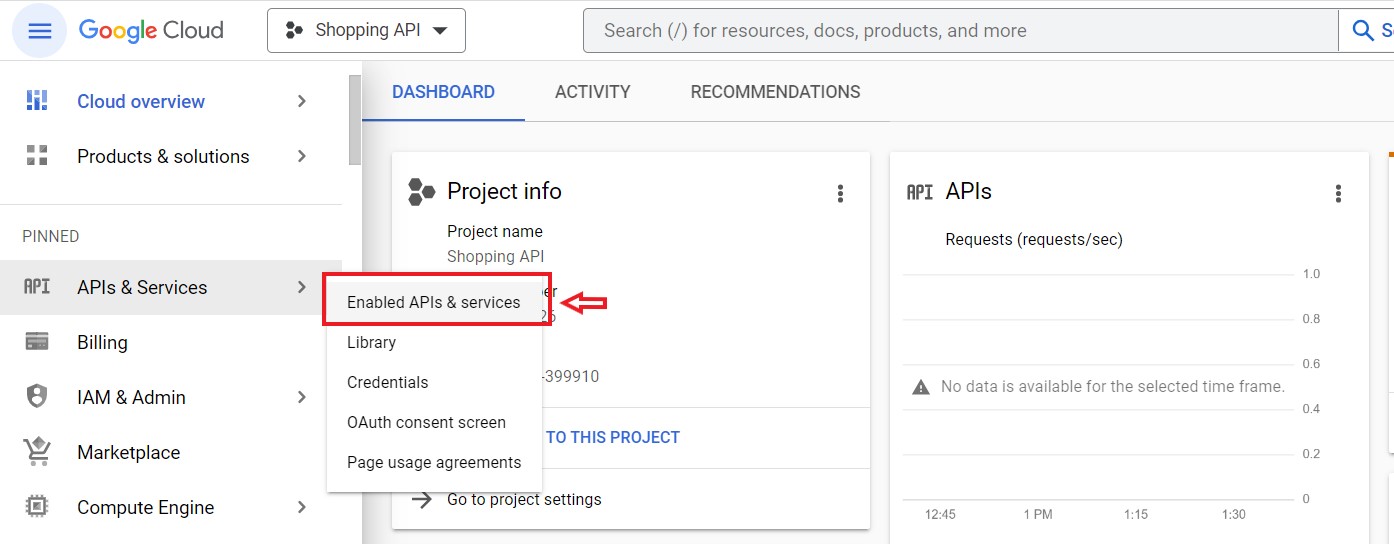
You need to enable the Google Cloud Translation API library for your project.
On the API Library page, type Cloud Translation into the search bar and select the API.
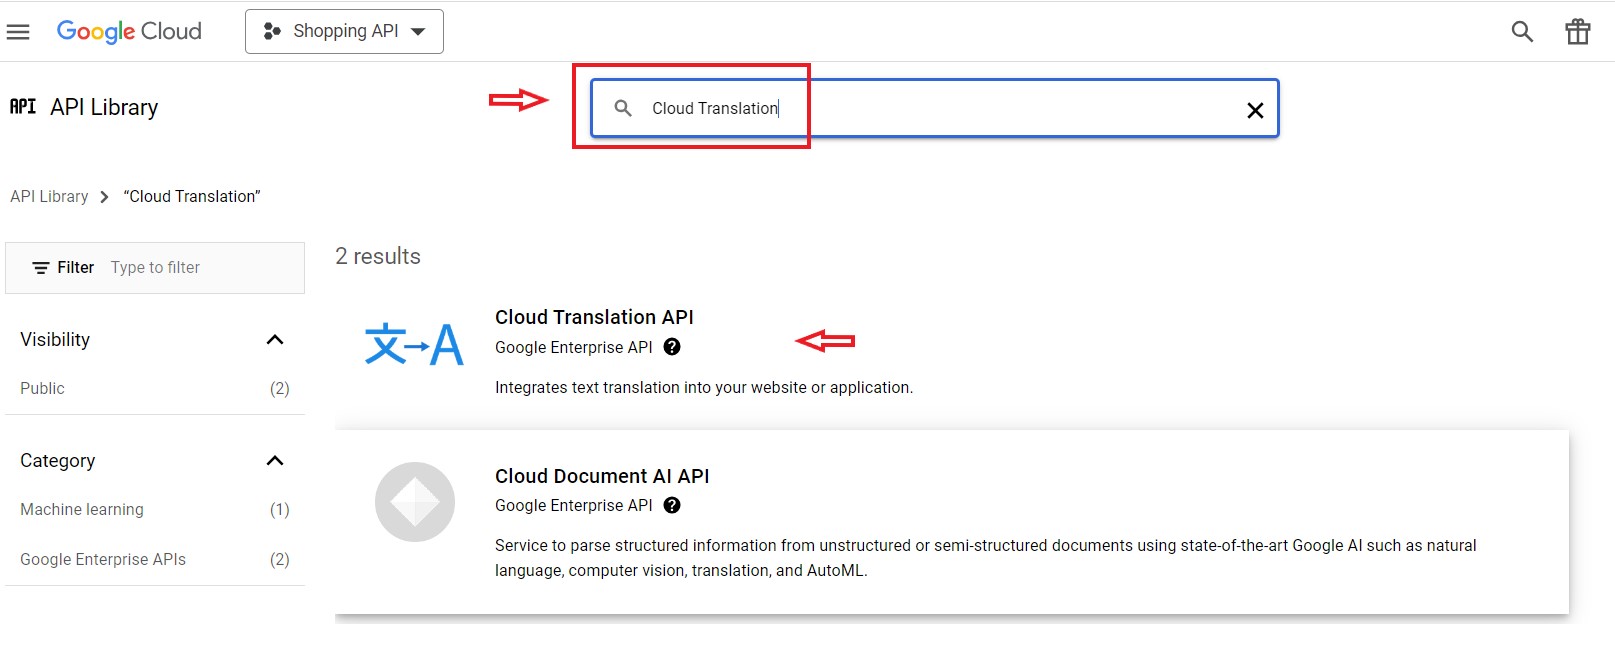
Click the Enable button on the page that opens. In the pop-up that appears, select the ENABLE BILLING option.
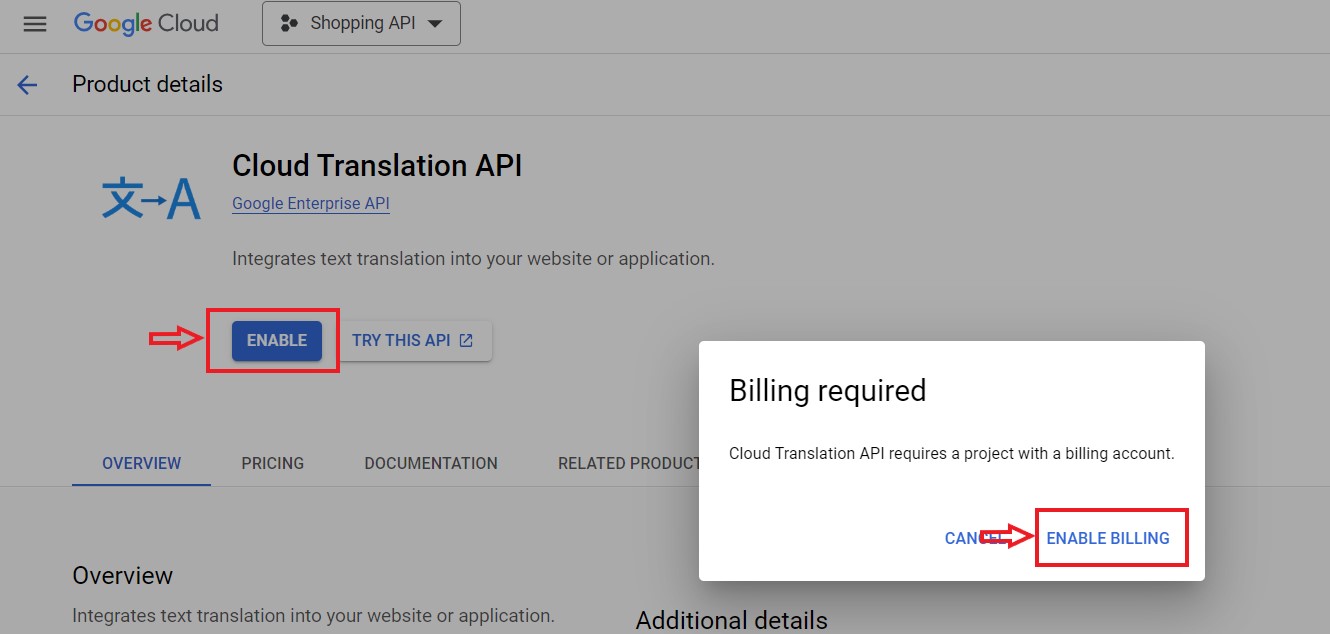
⚠️ Payment Verification
Automatic payments only start when you manually define extra quotas on your account. Under standard usage (below 500,000 characters per month) the free limits apply.
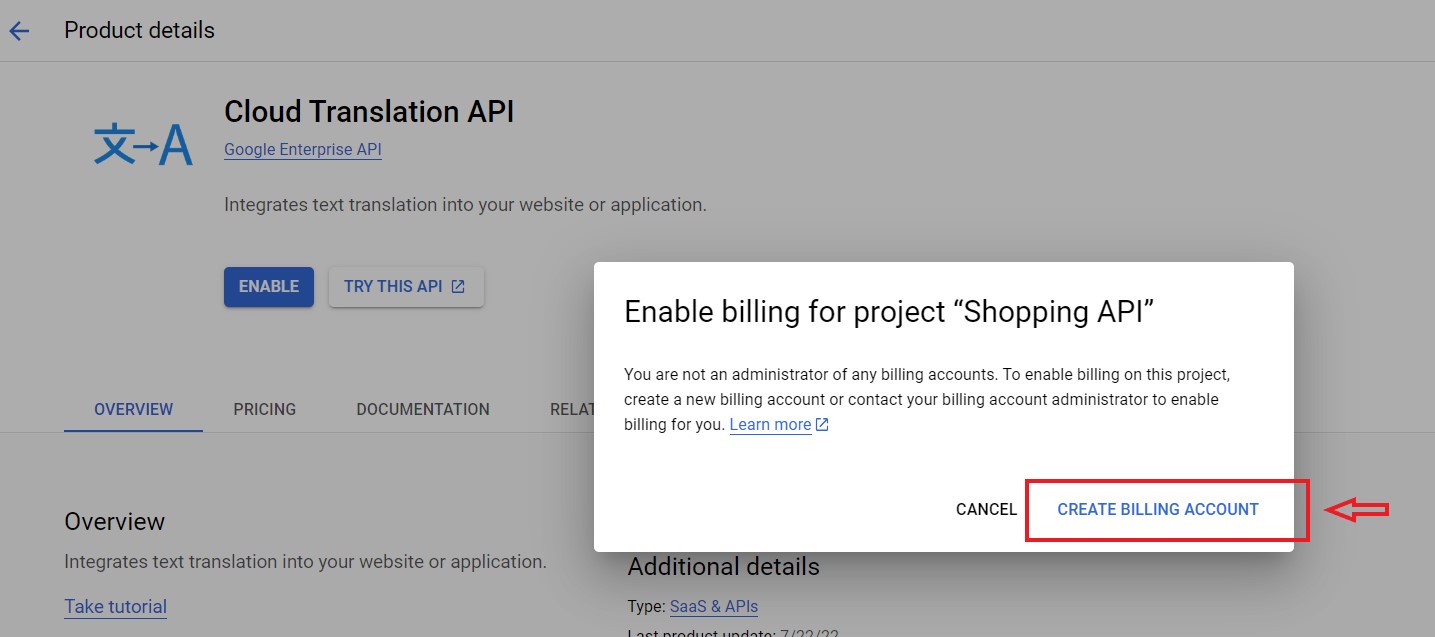
If you do not have a payment account defined in the system, continue with the CREATE BILLING ACCOUNT option in the window that opens.
Fill in the billing account steps. Select the option most suitable for you as Organization (e.g. Small Company) and enter your business email.
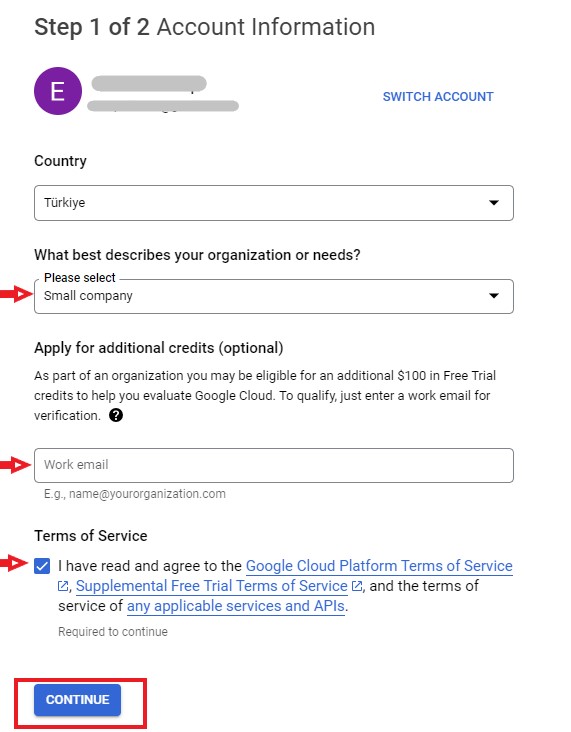
After entering the account type (Individual or Company), name, address, and card details, confirm the process by clicking START MY FREE TRIAL.
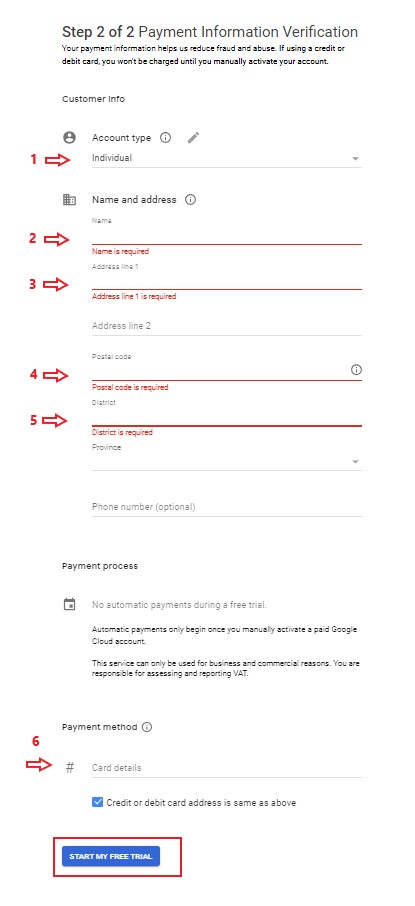
Step 3: Create a New API Key (Credentials)
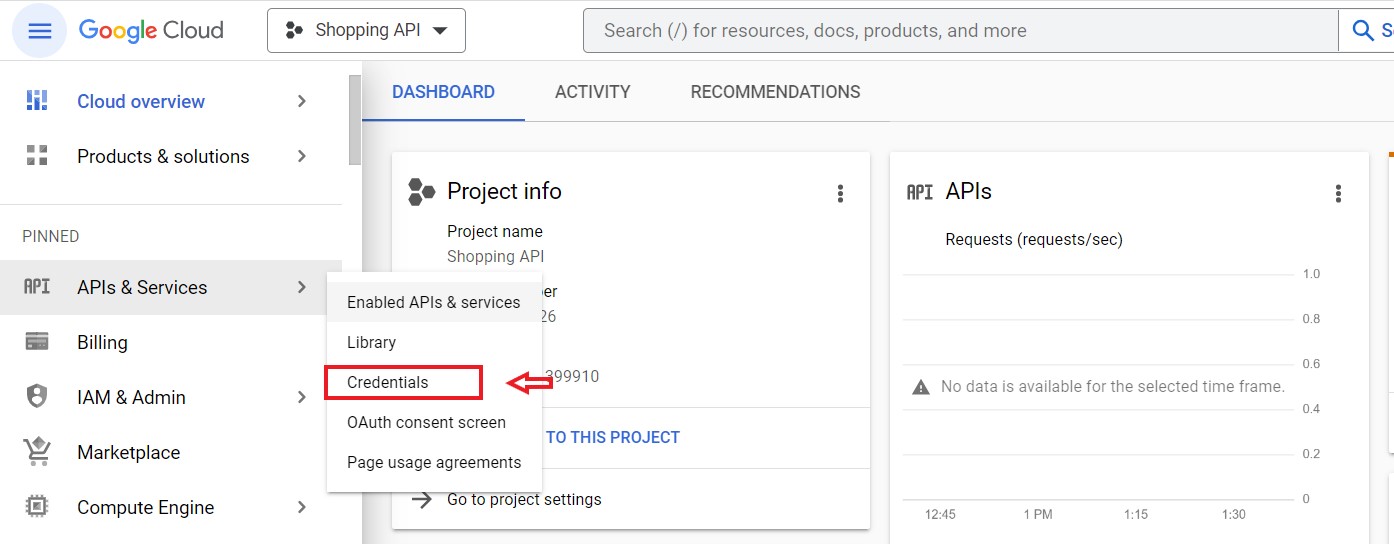
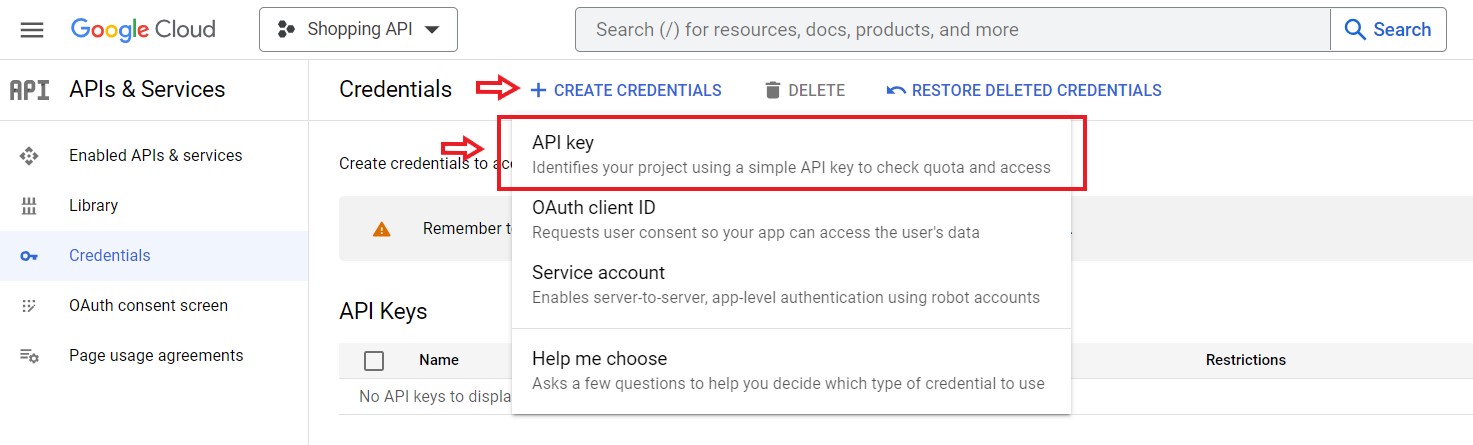
Switch to the Credentials tab from the menu. Click the Create Credentials button and select the API KEY option from the list that opens.
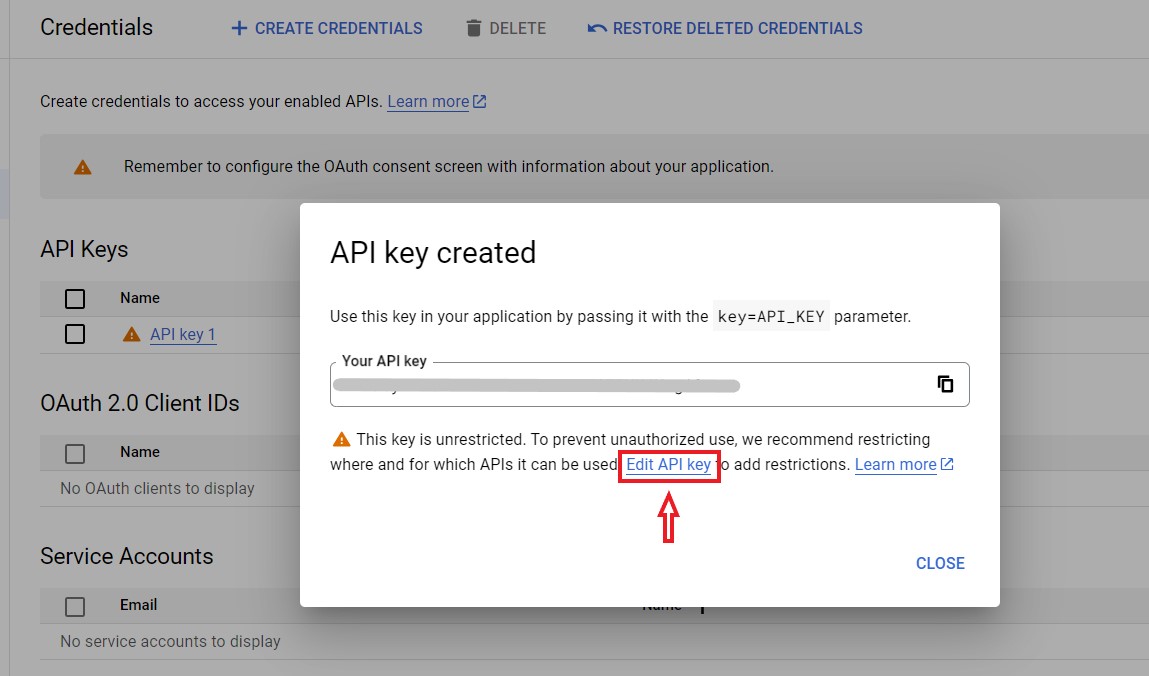
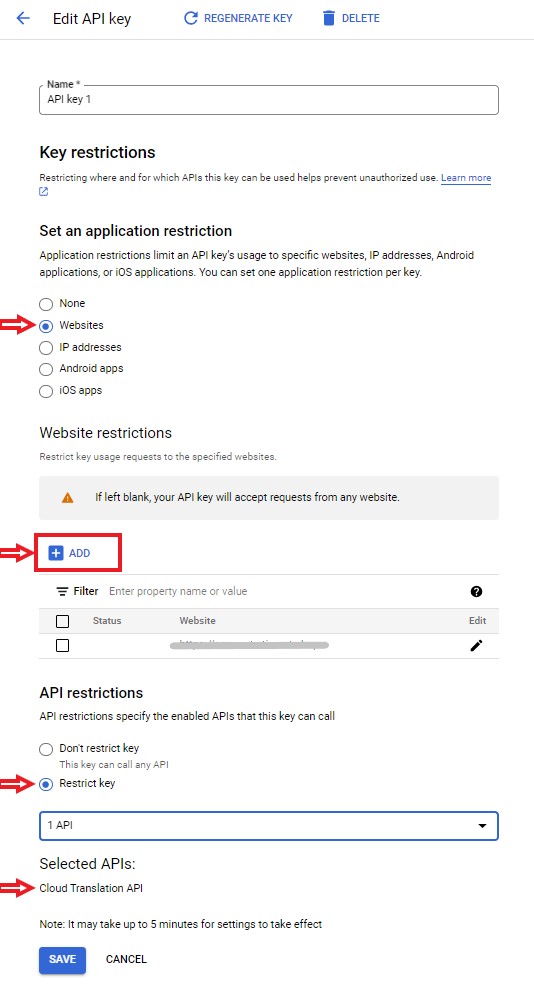
For better security, click the Edit API key link in the window that appears after creating your API key.
Step 4: Restrict the API Key to Your Site
This step prevents your key from being used on other sites.
- Select the Websites option from the Application restriction menu.
- Click the ADD button and enter your website address.
- In the API restrictions section, click Restrict key and select only the Cloud Translation API.
Step 5: Save the API Key to the Panel
After completing all settings, return to the Credentials screen. Get the code by clicking the copy button next to the key you created (or the Show Key option).
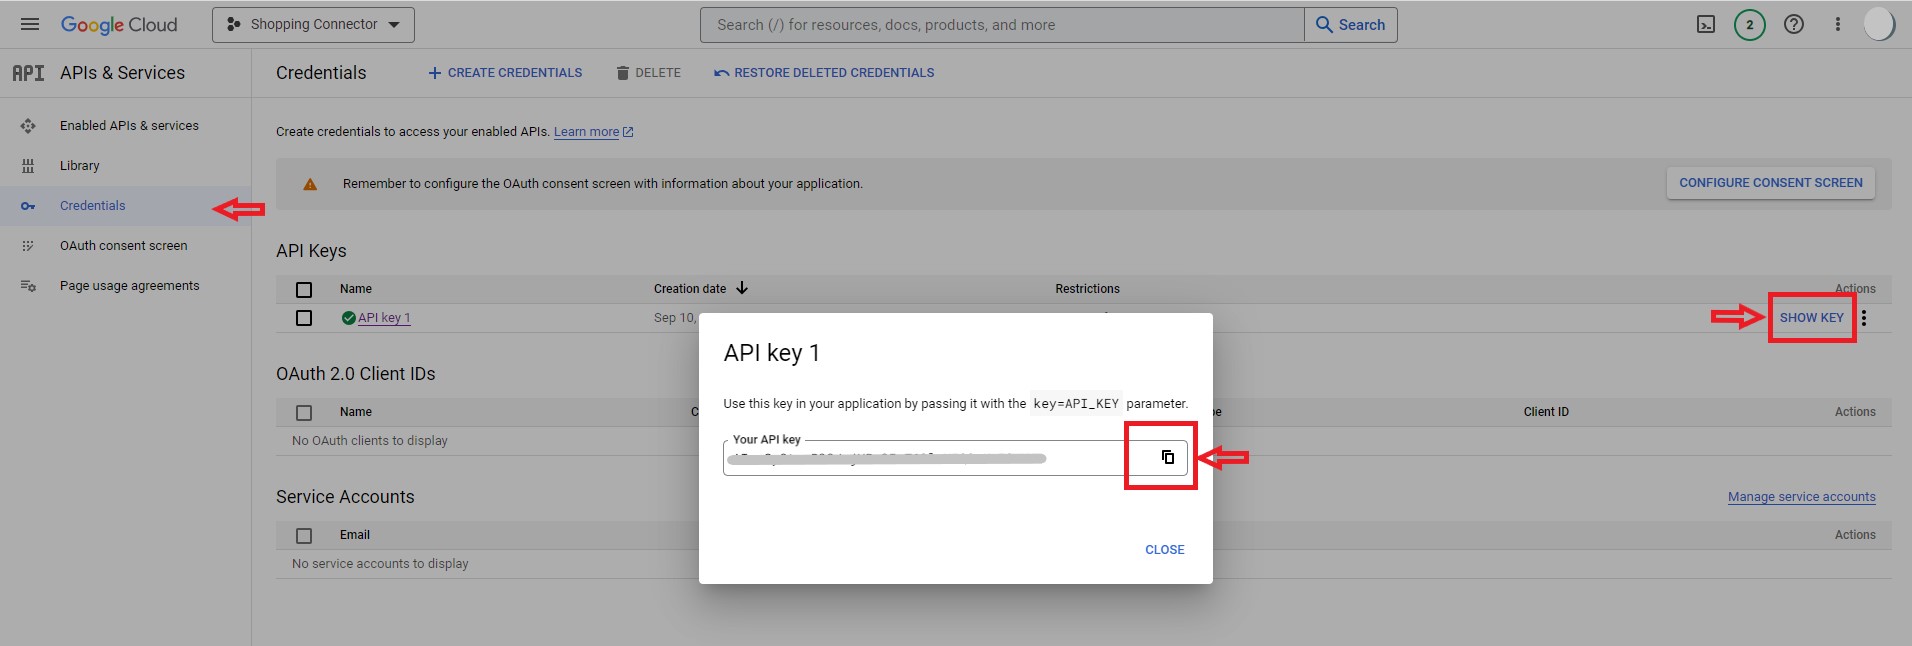
Paste the code you copied into the Google Cloud Api Key field under General Settings in your E-Ticaret Shop panel and press the Save button.