Page & Block Management
You can manage all the pages of your store piece by piece (block based) from the Design & Content > Block Management section. Each page consists of a row → column → block hierarchy. You can edit your pages with drag-and-drop without writing code; You can develop block templates directly with the Smarty TPL/SCSS/JS editor.
Page Structure
Sayfa
└── Satır (Row)  ← full-width ya da container
    └── Sütun (Column)  ← 12'li Tailwind grid
        └── Blok (Block)  ← içerik parçası (slider, ürün listesi, banner…)
As many lines as you want can be added to a page. Each row can be independently set to full-width (full) or centered container (container).
Grid System
EticaretShop uses a 12-column grid system based on Tailwind CSS. The width of each column is specified out of 12:
| Value | Width |
|---|---|
12/12 | 100% — covers the full line |
6/12 | 50% — two columns side by side |
4/12 | 33.3% — three columns next to each other |
3/12 | 25% — four columns next to each other |
Screen Size Breakpoints
| Breakdown | December | Description |
|---|---|---|
xl | Above 1366px | Large desktop |
lg | 801–1366px | Desktop / Laptop |
md | 640–800px | Tablet |
sm | 400–639px | Big phone |
default | below 400px | Small phone |
These ranges can be customized from the setting.scss file.
Automatic Inheritance (not-set)
If the value not-set is selected for a breakdown in advanced mode, the value of a subbreak is inherited.
Example: default:12 / sm:not-set / md:6 → default:12 / sm:12 / md:6 / lg:6 / xl:6
Page Management
When you enter the Block Management page, you can quickly find and select the page you want to edit (Ex: Homepage, 404 Page, etc.) from the drop-down menu at the top. When you click on the Setting (gear) icon right next to the selection area, the actions you can perform regarding the active page are listed:
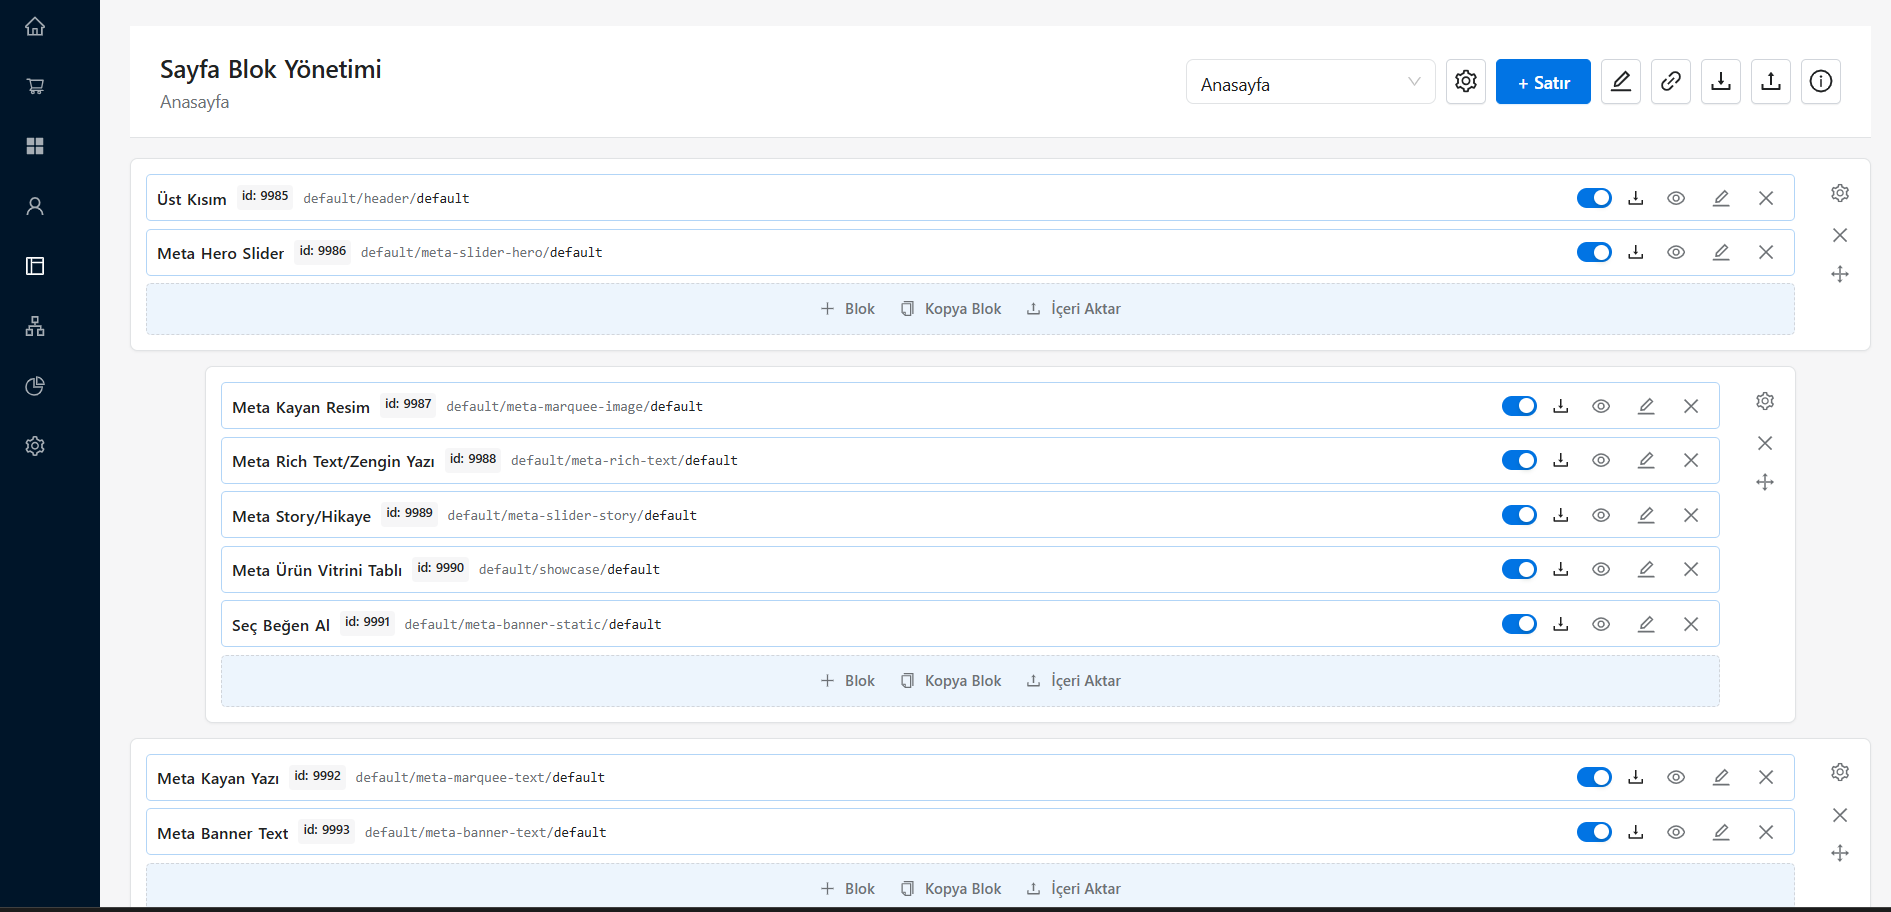
Page actions in the drop-down menu are:
- Add New Page: Create a brand new page from scratch with page name, SEO fields and default settings.
- Clone Existing Page: Quickly create a new variation of the page you are working on by copying its entire block arrangement and row/column structure.
- Delete Current Page: Completely remove pages you no longer need from the system (Care should be taken with default system pages).
- Translate Language: Easily manage translations of in-page texts and block variables into different languages.
- Scss & Font: Quickly switch to style files and typography settings that affect the design of the page.
- Convert to Scss: Compile the style (SCSS) changes and instantly convert them into CSS codes that the site can read.
- Blocks Using Custom Template: Easily identify blocks that have a unique template (TPL) assignment on the page, different from the default structure, by listing them.
Adding and Adjusting Rows
When you click the Add Row button, the following settings can be made in the panel that opens:
| Setting | Description |
|---|---|
| Container | On: the row is centered at max width. Off: covers the entire screen (full-width) |
| Flex Center | Centers content vertically |
| Number of Columns | Column selection 1–12 |
| CSS Class | Add custom Tailwind or custom class to row |
| Style | Apply inline CSS to the line |
You set column widths in Simple or Advanced mode in the row editor.
Simple Mode
Choose the column width for each view by switching the Mobile and PC preview with the Mobile / PC button. You can adjust the width by clicking and dragging the column edges in the PC preview.
Advanced Mode
Set the width of each column individually for all breakpoints (default, sm, md, lg, xl):
Sütun 1: default=12 / sm=12 / md=6 / lg=4 / xl=4
Sütun 2: default=12 / sm=12 / md=6 / lg=4 / xl=4
Sütun 3: default=12 / sm=12 / md=not-set / lg=4 / xl=4
Blocks within rows and columns can be reordered by drag-drop.
Adding Block
To add a block to a column, click the + Add Block button. You can search by block name in the panel that opens, find the appropriate block from the list and add it to the column with the **++ icon.
Copying a Block from Another Page
With the Copy Block feature, you can copy a block configured on another page, along with its content and settings, to your current page:
- Select the source page
- Select the block you want to copy
- Click the Copy Block button
Block Settings (Management)
Clicking on a block opens the block management page with 3 tabs:
Tab 1: Settings
block ID and general settings appear in the left panel, and custom settings defined in that block's setting.json file appear in the right panel.
Left Panel — General Information
| Area | Description |
|---|---|
| Title (Web) | Block title to be displayed on store front (multilingual support) |
| Sub-Title / Explanations | Description field (rich text) shown in certain block types |
| Theme | The theme folder that the block will use. You can edit the theme list with "Manage Theme Folders" |
| Template (TPL) | TPL file to use for the block |
| Sub-Templates | Different templates can be assigned for subcomponents within the block |
Authorization
Controls which types of users the block is visible to:
| Option | Description |
|---|---|
| Let the Visitor See | Visible for non-logged in users |
| Member View | Visible for logged in members |
| Dealer See | Visible for users with reseller authority |
Device Visibility
Controls which devices the block will appear on:
| Option | Description |
|---|---|
| Desktop | Show on widescreen |
| Tablet | Show on center screens |
| Mobile | Show on small screens |
Right Panel — Block Custom Settings
Each block can have settings defined in its own setting.json file. These settings appear as various form components:
Setting Type (xtype) | Form Component |
|---|---|
input | Single line text box |
textarea | Multiline text box |
color | Color picker |
checkbox | Checkbox |
select | Dropdown list (static options) |
select-remote | Dropdown list (dynamic options from API) |
multiselect | Multiple selection list |
inputnumber | Number entry |
datepicker | Date picker |
editor | TinyMCE rich text editor |
upload | File upload |
image | Image upload |
video | Video URL/upload |
url | URL selector |
object | Object space |
grid | Table/list structure (shown at top) |
meta | Meta information area |
Settings File (setting.json) Download/Upload
You can export/import the settings file with the Manage Settings button:
- Download Settings: Downloads the settings structure (optionally with their current values) as JSON
- Load setting.json: Loads the new settings file. Options:
- Set setting values as well: Also applies the values in the loaded file
- Delete unused settings: Clears obsolete settings from the database
Tab 2: Editor
It is the code editor tab where you directly edit block source files. Three types of files are managed for each block:
| File | Description |
|---|---|
| TPL | PHP Smarty template file (.tpl) — HTML structure and Tailwind classes |
| SCSS | Additional custom styles for the block (if Tailwind fails) |
| JS | Block specific JavaScript code |
Actions in the editor toolbar:
| Button | Function |
|---|---|
| Select File | To replace the template file, select file from directory tree |
| Add Image | Add image into TPL with image upload |
| Add File | Add static file |
| Save As | Save existing content with a new filename |
| Compare | Compare between two different files or versions with diff view |
| Changes | List past versions of the file and restore to previous version |
| Publish | Just go live this blog |
| Publish All | Go live with all changes |
| Delete | Delete selected template file |
| Upload AI JSON | Automatically create TPL and meta records by loading AI-generated JSON output |
TPL Format
Template files are processed with the PHP Smarty engine. Variables such as {$block.title}, {$block.settings.key} can be used within the block. Language variables are called with the syntax {lang}DEGISKEN_NAME{/lang}.
Dynamic Rendering with Tailwind
All templates are coded with Tailwind CSS. Since each block is rendered independently with Tailwind classes, a style change to one block does not affect other blocks.
Comparison (Diff) Screen
It shows the differences between two files or versions in color with the diff2html library. Separate comparison can be made for TPL, SCSS or JS. Comparisons can be made by listing past versions for each file.
Tab 3: Language Variables
Each block keeps the language variables it can use in its template in its own language/ folder (eg: tr.conf, en.conf). These variables are edited in this tab.
Adding / Editing Variables
Each language variable contains a key and a value for each language. The value field supports rich text (HTML).
Anahtar: KAMPANYA_BASLIK
Türkçe: Yaz İndirimi
İngilizce: Summer Sale
Bulk Translation
Translation of all variables can be done automatically with Google Translate by selecting Source Language and Target Language.
Export/Import
Language variables can be exported to Excel or Text format and the edited file can be restored. It is possible to choose which languages to include when exporting.
Libraries Automatically Loaded by the System
The following libraries are automatically loaded on each page — no additional import required:
| Library | Intended Use |
|---|---|
| jQuery | DOM manipulation, AJAX |
| Vue.js 3 | Reactive components, interactive UI |
| Swiper.js | Slider/carousel |
| Font Awesome | Icon set |
| SwiperJS CSS | Swiper styles |
Template File Structure
For each block template, the server has the following folder/file structure:
themes/
└── [tema-adi]/
    └── [blok-adi]/
        ├── [blok-adi].tpl        ← Ana Smarty şablonu
        ├── [blok-adi].scss       ← Bloka özel stiller
        ├── [blok-adi].js         ← Bloka özel JS
        ├── setting/
        │   └── setting.json      ← Ayar tanımları
        └── language/
            ├── tr.conf           ← Türkçe dil değişkenleri
            └── en.conf           ← İngilizce dil değişkenleri
Sub-Templates
If a block offers more than one view variant, subtemplates can be defined in subfolder/. From the Settings tab, you select which sub-template to use for each sub-component. In this way, you can manage different versions of the same blog on a theme-based basis.
Theme Management
Blocks are grouped under theme folders. From the "Manage Theme Folders" screen:
- Can add new theme folder
- Can see how many blogs are using that theme
- You can list blocks in use
Theme Export/Import
You can use Theme Export to move or back up the page structure you prepared to another store:
- Select pages to export
- Select blocks to export for each page
- Download as JSON file
Load the JSON file to import — the page and block structure is automatically generated.